I love the femininity of the ruffle lamp shade. As I was browsing around Hobby Lobby I found this:
I loved the ruffles, but not the price tag and the fact that it comes in only one size. Of course, I decided I could make my own.
I googled around to find a similar self made shade. I found these 2 (drab to fab , and A little piece of heaven) that were close contenders, but neither one were quite what I was wanting.
This was so easy! I have two more shades that I'm going to have to do.
I started with the burlap lampshades that seems like I just got from Target. Loved them so much when I got them. Now I'm covering them up. Guess I'm fickle like that. :-) Anyways, I cut some strips of fabric. Frayed edges are fine with me. I used some left over painters drop cloth fabric and some stripped fabric that I had on hand. I plugged in my hot glue gun and went to town.
I didnt really take any as I was doing it pictures. But, I simply started on the seam of the shade and took a strip of my fabric. I folded the fabric in half (length wise) as I was gluing it down. I glued down the middle of the fabric bunching it up as I went. I hope you understand my super technical terms. :-) It kinda looks like I had ruffled the fabric and then glued it down. But, this is a NO sew project. So, I glued and ruffled as I went.
And, kept going.... Here you can see that little bit of where the ruffles didnt meet enough to cover the burlap shade. No worries. See the little fabric scrap at the bottom of the picture? Glued and ruffled it on the bare shade spot.
Worked.
Here it is all lit up. Love it. Of course I had to make a little flower to go with it. Its the same fabric as my No Sew Pillow Cover. Plus I made it almost like I made my Burlap Fabric Flower.
Liking up (cause its more fun that way)...

 http://www.myrepurposedlife.net/
I was in Tucson, AZ with my husband and as we were driving down the road I happened to spot something that I was very keen on checking out. So, naturally I started screeching to my husband, "turn around, Turn around!" He turned around and there we were... in the parking lot at Habitat for Humanity. VERY exciting, my first Habitat for Humanity store.
I found a few things I was really interested in, but Handy Hunk just wanted to get home. SO, I didn't get a single thing. I had spied a bed set in the back tucked behind all the other beds. As we were getting back into the trucks I was lamenting to Handy Hunk how much I really liked the bed set. He told me to go back in and make an offer. (I'm sure he knew he'd hear all about how I should of gotten it...;-) ) Short story shorter, I got the bed set for $30. Thanks Terry! He's the Director of Retail Operations there. Really nice guy!
I did a little research on the Showers Brothers Furniture to make sure I wasn't about to repurpose something incredibly rare... didn't find much, so on with my plans...
The front legs were going to be too short, so I ended up taking some of the middle railing that was left over from when I cut it in half and doweling them to the bottom of the existing front feet. Let me tell you- that was a lot of fun :-)
Thankfully you can not really tell that I had to add to the feet.
Handy Hunk did have to help me a bit with cutting the seat. Apparently I didn't make it completely even and level. :-)
Bench Seat Take 1:

Just stained it with some of the stain I already had on hand. I thought it looked just ok. But it just wasn't doing anything for me. SO...
Take 2:
I sanded back the stain then watered down some of the red paint and painted it on. A definite NO for this one.
Take 3:
Since I was almost completely out of the ASCP Old White I watered it down to get as much coverage as I could. I am not wanting to have to buy any more of this paint, so I had to keep watering it down to make sure I could cover the whole area.
Take 3 1/2:
Since I didn't have quite enough of the white to cover it all and some of the red was still peeking through I ended up just sanding it back. Maybe a little too much, but oh well. Its how its going to be for a while.
I framed the Showers Brothers label. The Dollar Tree has little wooden frames for a whole buck- love that. The label says that it was shipped to the Fort Wayne Indiana store. Which is very close to where my dad is from. I still have family back there, so I was really excited when I saw this label.
I did a really light coat of paint which was mostly water. I had some hardened paint in the top of the can so I put water in it let it sit for a while and then mixed it as best I could and brushed that on the back of the bench.
I love the detail this bed has.
Linking up to:


Have ya'll tried grilled lettuce?? Oh my! It is so good! My brother was telling me about how he's been doing it. So, of course I had to google it. I feel like I'm totally late to the party. Its SO GOOD!!!
I found Grillin Fools, awesome website! Step by step instructions. There's a whole section on grilling veggies and fruit. I've got some experimenting to do.
What I did was so easy and super yummy. Handy Hunk even tried a bite and said it was good. (Coming from him- is a BIG thing. He's a massive meatatarian.)
I put minced garlic, Garlic Olive Oil (I get it from The Queen Creek Olive Mill), roasted sesame seeds, black pepper, and a pinch of sea salt. Then I grilled it. I think I should of left it to grill just a bit longer, but this was my first time and I was a little unsure about it. As soon as I took it off I put some shredded Parmesan cheese on it. Then on one half I put the dried cranberries and sliced almonds. I poured a little bit of a sweet balsamic vinaigrette on it and Oh my! I ended up doing the same thing to the other half. I can't wait to do it again.
My $12.83 version:
Their $199 version:
 via
I do like the Frontgate pool towel stand alot. I do not like the price tag that went with it though. It's normally $279. But, wait! Its on sale for only $199. Um..., no I don't need to spend 200 bucks on something to hold a wet towel.
So, I was in Home Depot :-) and thinking about a towel stand... Hmmm I bet I could do something similar with some PVC...
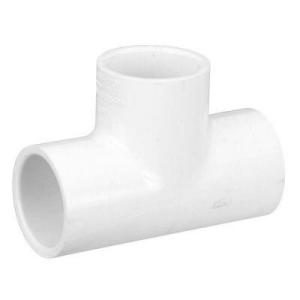
Slip Tee's
via
I do like the Frontgate pool towel stand alot. I do not like the price tag that went with it though. It's normally $279. But, wait! Its on sale for only $199. Um..., no I don't need to spend 200 bucks on something to hold a wet towel.
So, I was in Home Depot :-) and thinking about a towel stand... Hmmm I bet I could do something similar with some PVC...
Slip Tee's
 via
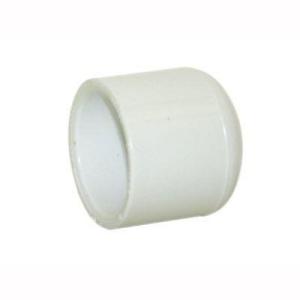
Caps
via
Caps
 via
I had a concrete umbrella stand already. So, I used that for my base. I took the 10ft piece of PVC and cut it down to make my 4 arms. Then I marked the left over pvc about where I wanted my arms to be and cut. Then I put the slip tee in added my arm and put the next piece of pvc into the top of the slip tee. Then capped all the ends and the top. I did drill a hole into the pvc where the umbrella stand pin goes through. Just to keep it from blowing over. Then I just spray painted it and done. So easy!!
via
I had a concrete umbrella stand already. So, I used that for my base. I took the 10ft piece of PVC and cut it down to make my 4 arms. Then I marked the left over pvc about where I wanted my arms to be and cut. Then I put the slip tee in added my arm and put the next piece of pvc into the top of the slip tee. Then capped all the ends and the top. I did drill a hole into the pvc where the umbrella stand pin goes through. Just to keep it from blowing over. Then I just spray painted it and done. So easy!!
1- 1" PVC pipe (10feet)...........................$3.50
4- 1"PVC slip Tee @ 0.69 each..............$2.76
5- 1" PVC slip Cap @0.54 each..............$2.70
1- can of spray paint..............................$3.87
1- umbrella stand (already had)...........$free
_______________________________
Grand Total:.........................................$12.83
Savings of ............................................$187.17
Not too bad. Plus I can change the color whenever I want. And, I'm thinking about getting another post finial and putting it on the top to make it even nicer.
Linking up to:
YAY!!!!


